


Packed with features, GameSynth can be a bit overwhelming at first, and this is certainly true of its patching environment. In this post, we give you 30 tips to start patching in the Modular model in no time!
Settings
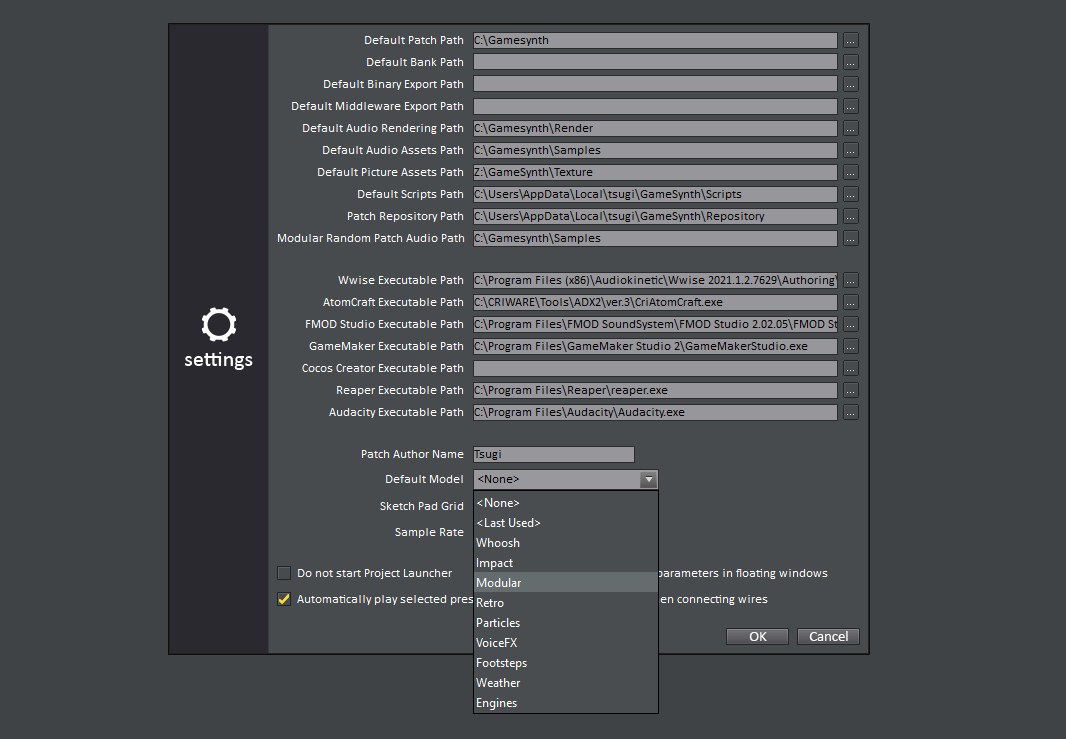
First, let’s configure the main settings to work faster with the Modular.
01Default model
In the settings window, it is possible to set the default GameSynth model. If you are planning on diving into patching, select the Modular, and it will open automatically every time you start the tool.
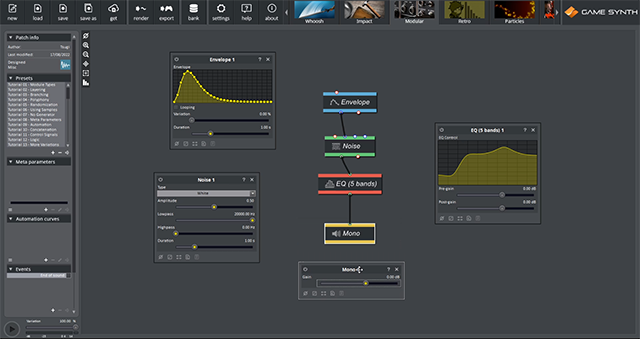
02Floating windows
The Modular model has 2 editing modes for the module parameters. The default one displays the parameters of the selected module on a panel on the right. Opt for the floating parameter windows for faster operation when copying values between modules etc..
03Snap to plug
To connect modules faster, select the snap to plugs option in the settings. While you are wiring, as soon as you are in the vicinity of a plug, GameSynth will offer to connect it.
Documentation
GameSynth comes with many manuals that will help you to get started and to learn advanced patching. All these resources are available directly from within tool, in the Help Center.
04Modular Documentation
The Modular model comes with its own 200+ pages documentation, which includes 3 main sections: basic operation, patching techniques (highly recommended), and modules reference.
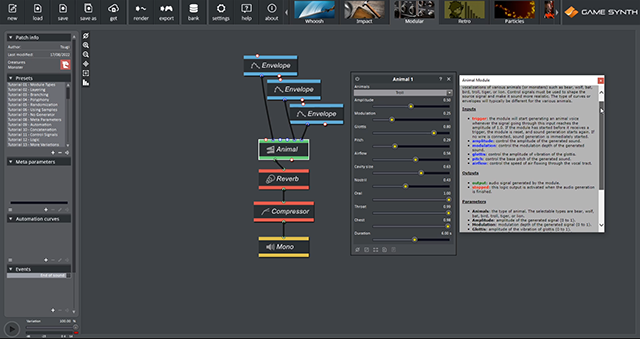
05Context documentation
Click on the question mark at the top of a module’s window to get all the information you need while patching: the module’s function, its inputs, outputs and parameters.
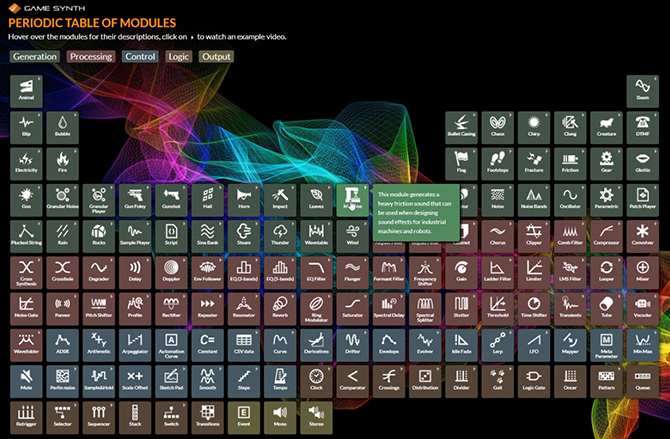
06Periodic Table of Modules
This interactive table offers a convenient overview of all the modules available in the Modular model. Organized similarly to the periodic table of elements, it includes a brief description of each module, as well as some example videos.
Inspiration
You can check existing patches to get ideas about how to build your own!
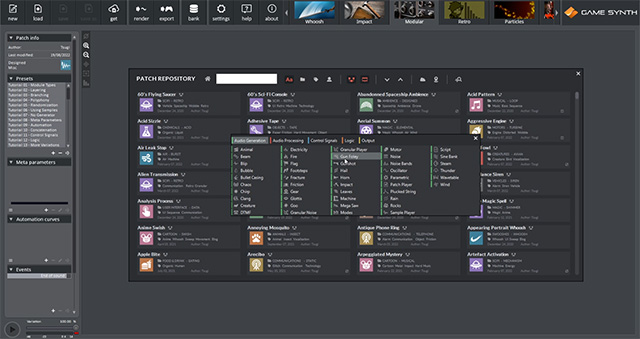
07Patch Repository
The patch repository is the largest collection of procedural patches available today, with extensive searching and sorting functions. Use the Model filter to list all Modular patches. You can also filter per module used, which is very helpful when learning how to use a new module!
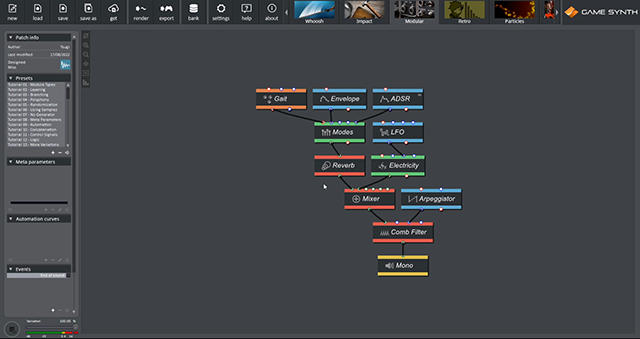
08Random Patch Creator
An infinite source of inspiration: press Ctrl + P to create a new random patch, guaranteed to be structurally correct and to generate sound. You can set a special audio folder in the settings window, from where the wave files will be imported by sample-based modules.
09Tutorials
About 100 posts about GameSynth are available on our blog at the time of this writing, most of them patching tutorials. They offer advice on how to patch for specific types of sounds (environment, medieval weapons, sci-fi, cartoon etc.) and can be accessed from within the tool in the Help Center

Organization
For more productive patching, re-use groups of modules, and keep your patches well organized.
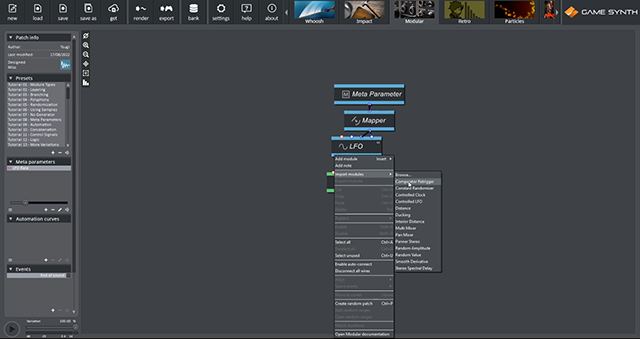
10Importing groups of modules
You can re-use functional components in your patch by using the “Import modules” and “Export modules” functions of the context menu. GameSynth already comes with some predefined components to create stereo effects, perform automatic ducking, randomize parameters, and more.
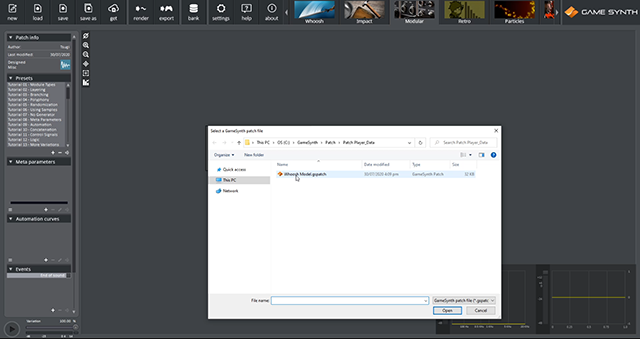
11Embedding patches
You can also embed complete patches of any type (Impact, Particles, etc.) by using a Patch Player module. The meta-parameters of the embedded patch will appear as parameters of the Patch Player module, allowing you to control them like in any regular module.
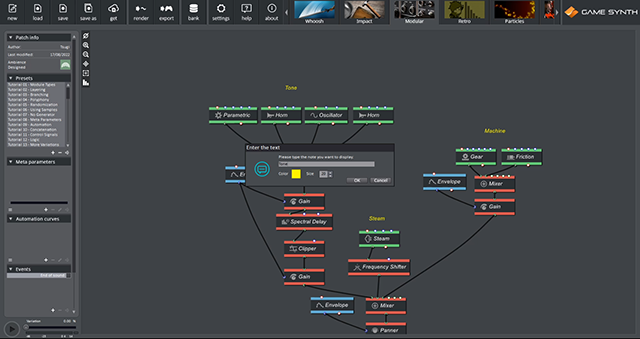
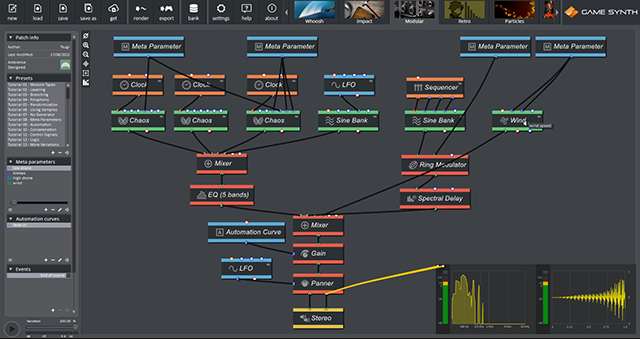
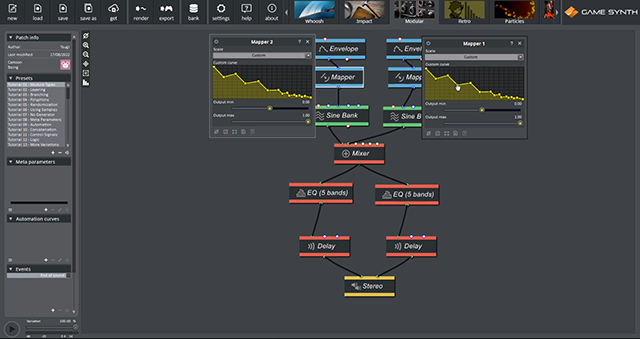
12Beautifying and annotating
For advanced patches with many modules, you can press ‘Home’ to center them and switch to the optimal zoom level automatically. Also use the Ctrl + Arrow shortcuts to align groups of modules. Finally, you can also write notes on the patching area to keep track of the role of each section of the patch.
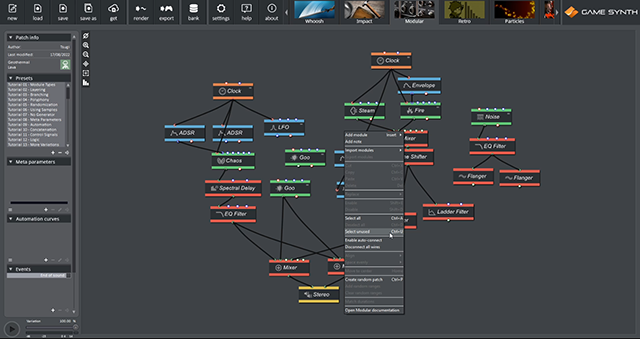
13Removing unused modules
Once you are happy with your patch, you can easily remove any unused module from the patching area. Simply use the “Select unused” function of the context menu and press ‘Delete’ to remove them.
Testing / Debugging
Quickly testing different modules and checking their output will help you to patch and find issues faster.
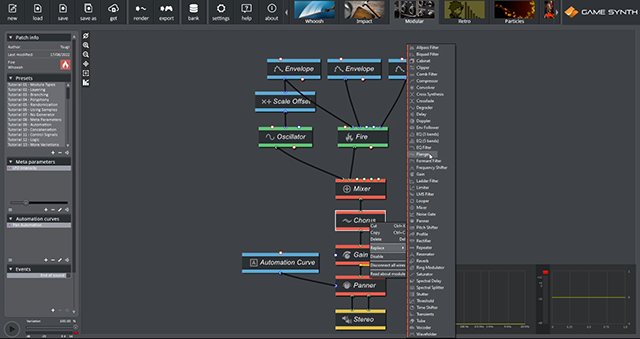
14Replacing a module
You can easily swap modules of the same type via the context menu. This is very useful to find the best suited generator or effect processor for a patch without hindering your creative process.
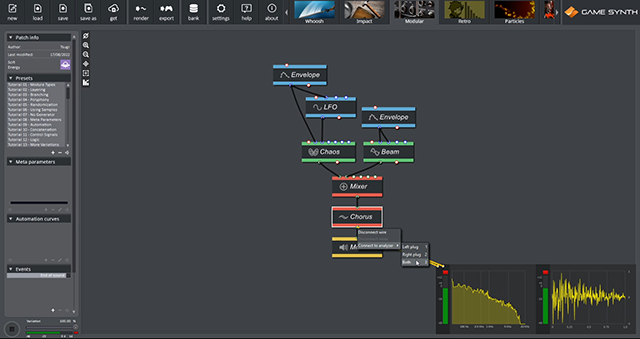
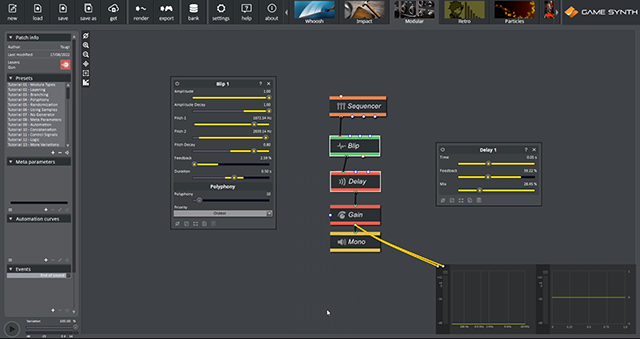
15Quick connection to analyzers
It is possible to connect a plug to an oscilloscope or a spectrum analyzer to examine the signal that goes through it. You can do it even faster by pressing on the ‘1’, ‘2’ or ‘3’ keys while hovering over a plug, to automatically connect it to the oscilloscope, spectral analyzer or both.
16Visualization of wire content
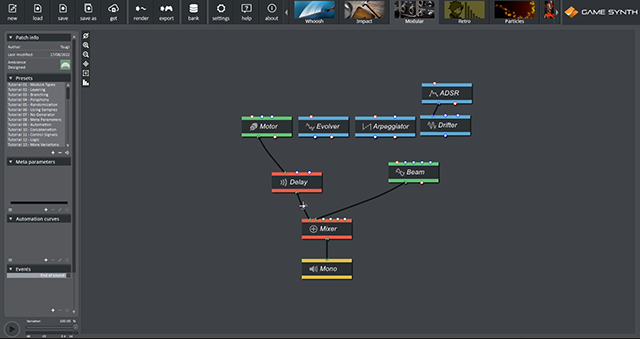
If you are only interested in checking the waveform, you can simply move the mouse over a wire during playback to see the signal going through it.
17Partial playback
To play back the signal going through a wire, move the mouse over it and simply press Alt + Space. This is especially useful when you want to play a single branch of a patch before it reaches a mixer.
Adding Modules
There are several ways to find and add the right module faster.
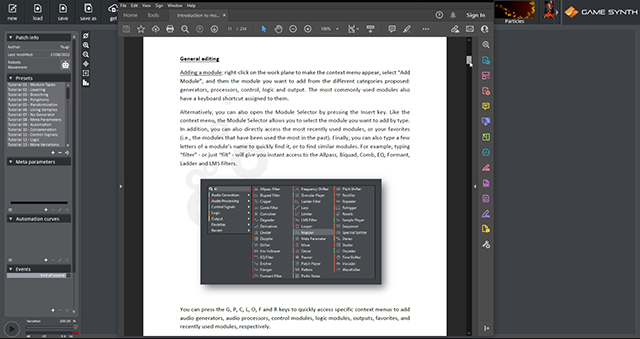
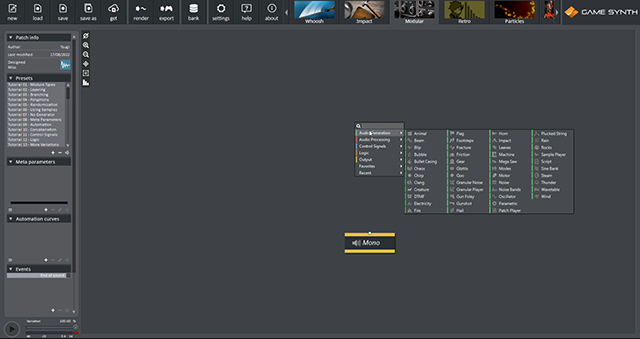
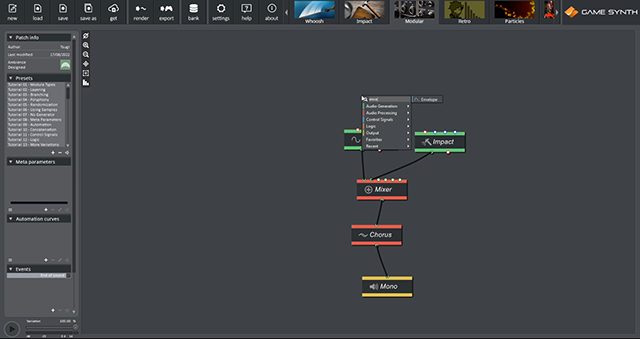
18The floating menu
A special floating menu to add modules can be accessed by pressing the ‘Insert’ key. It allows to quickly find a module by typing a few letters of its name, or to select it based on its type. It is also possible to quickly insert modules that have been recently used or are the most often added.
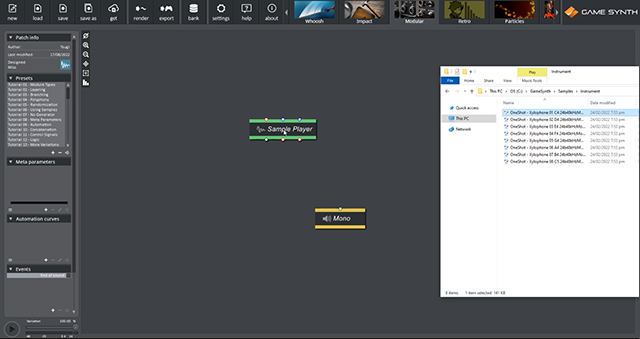
19Quickly adding samples
Dropping a wave file from Windows Explorer onto the patching area will automatically add a Sample Player module to the patch and assign the wave file. If several files are dropped at once, a Granular Player module will be created instead, containing all the files.
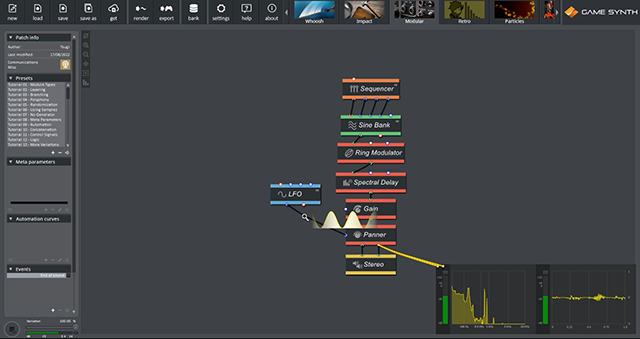
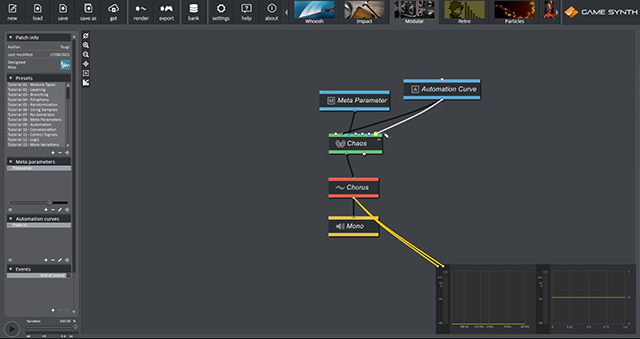
20Quickly adding control
You can also directly drag and drop meta-parameters, automation curves and events from the patch information panel onto the patching area. The corresponding modules will be automatically created, and the right objects selected.
Connecting
When patching, a lot of time is usually spent connecting modules. It does not need to be!
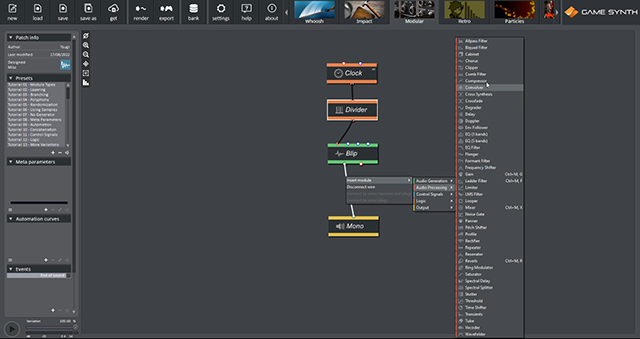
21Fast Connection
While moving a wire, you can press on “Enter” to automatically connect it to the closest free plug. In addition, by right-clicking on an existing wire and selecting the “Insert Module” function, it is possible to insert a module, connecting it to its parent and child modules automatically, based on the types of plugs.
22Fast Disconnection
You can disconnect modules by right-clicking on a plug or on a wire. However, a quicker way is to simply move the mouse over a wire, press Shift, and click, which will cut the wire.
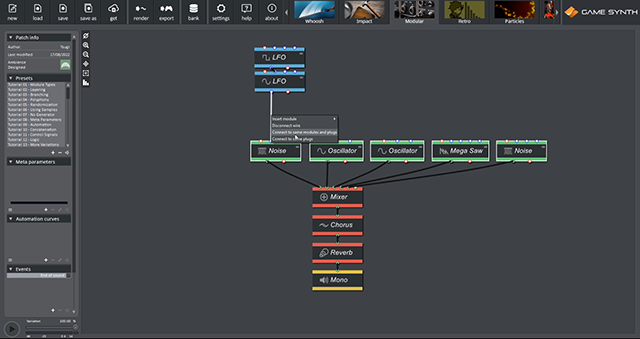
23Similar connections
If you have to make similar connections (e.g., connecting a single envelope to the amplitude inputs of several sound generators), simply connect the first wire, right-click on it, and select the “Connect to same plugs” or “Connect to same modules and plugs” functions.
24Auto-connect
Select “Enable auto-connect” in the context menu to enable the auto-connect mode. When adding new modules, it will automatically connect them to the ones already in the patch based on proximity, type, function and even your patching history
Quick Editing
Being able to quicky edit parameters is a must if you want to patch faster.
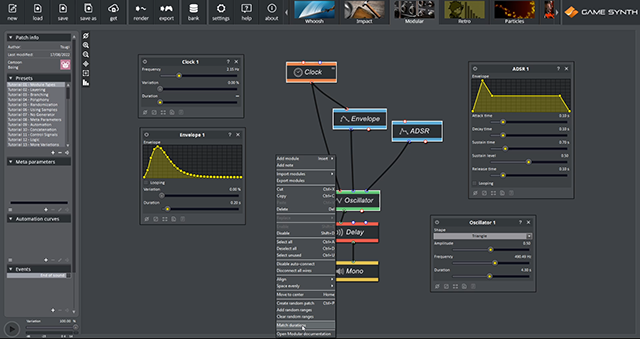
25Matching Durations
When mixing several generators, or using various envelopes to modulate a patch, these modules often need to have the same duration. Instead of adjusting them individually, you can select them and use the “Match durations” command of the context menu.
26Copy / Paste between modules
At the bottom of each module parameters window are Copy and Paste buttons to copy settings between modules. In addition, it is possible to directly drag and drop graphical elements from one module to another while pressing the “Ctrl” key. This is a convenient way to copy curves and other data (works with Envelope, Mapper, Modes, Noise Bands, EQ 5 bands…)
27Adding random ranges
Adding random ranges to a lot of parameters can take time. An option to speed up this process is to select modules and to call the “Add Random Ranges” function. Alternatively, each nodule parameter window also has an “Add Random Ranges” button at the bottom.
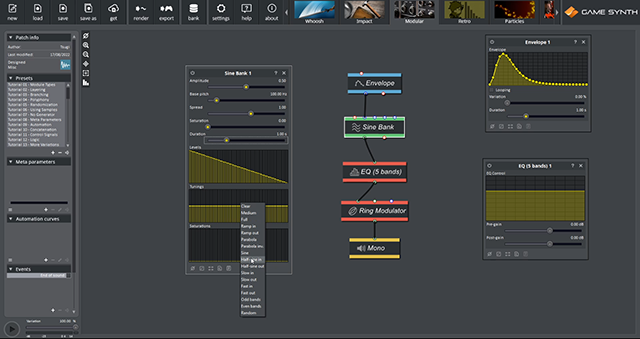
28Presets
Many modules requiring graphical editing come with useful presets to make you save time. Right-click on the graphical representation and a context menu will offer you pertinent options. This works with many modules: Envelope, EQ 5 bands, Vocoder, Sine Bank, Noise Bands, etc..
External
GameSynthC is the command line version of GameSynth. It offers unique functions to generate, render, and analyze patches.
29Random patches
The -random command will call the random patch creation feature of the Modular model repetitively, creating a new patch each time and rendering the corresponding sound as a wave file. Optionally, it is also possible to save the patch file for future use.
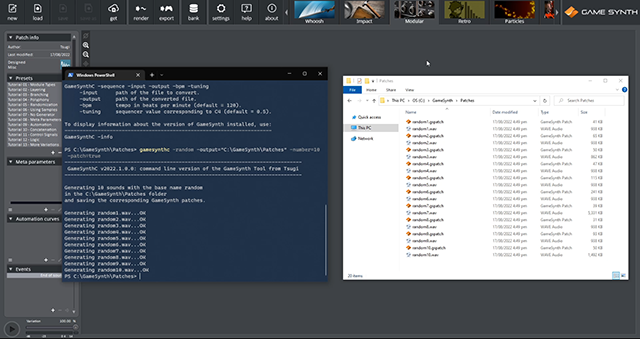
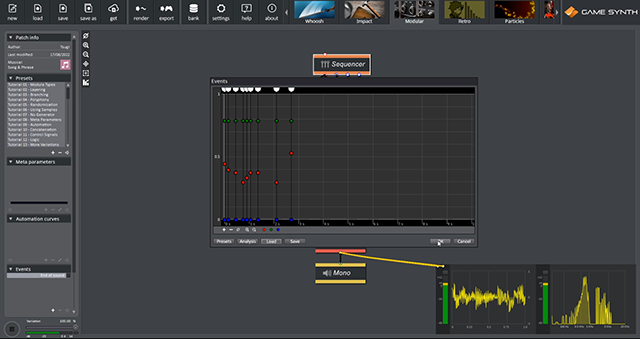
30Musical sequences
The Sequencer module is great to trigger sonic events but was not conceived to create melodies, and it takes a lot of time to set accurate pitches and durations. Thankfully, the -sequence command will convert a musical script (.txt) into the right data for the Sequencer. It is especially great to compose retro game music!
We hope that these 30 tips will help you patch faster and create amazing sounds with the Modular model. Anything we missed? Please let us know your favorite productivity tips in GameSynth!
