


We are happy to announce the release of the QuickAudio 1.1 update.
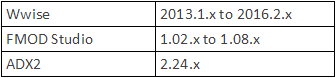
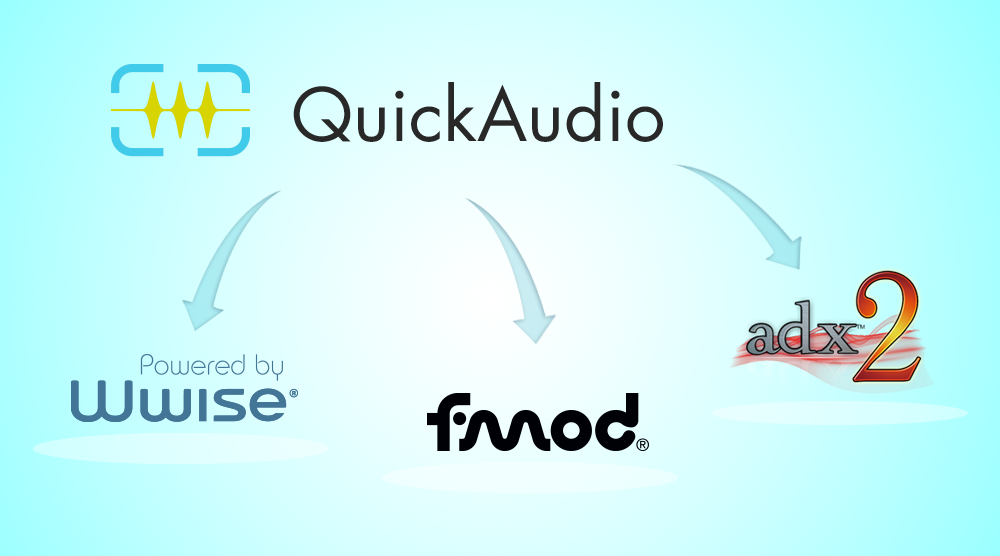
This new version updates game audio middleware support to the latest versions of Audiokinetic’s Wwise, Firelight Technologies’ FMOD Studio and CRI Middleware’s ADX2 – while staying compatible with older versions in case you didn’t make the jump yet.
The middleware versions now supported are summarized in this table:
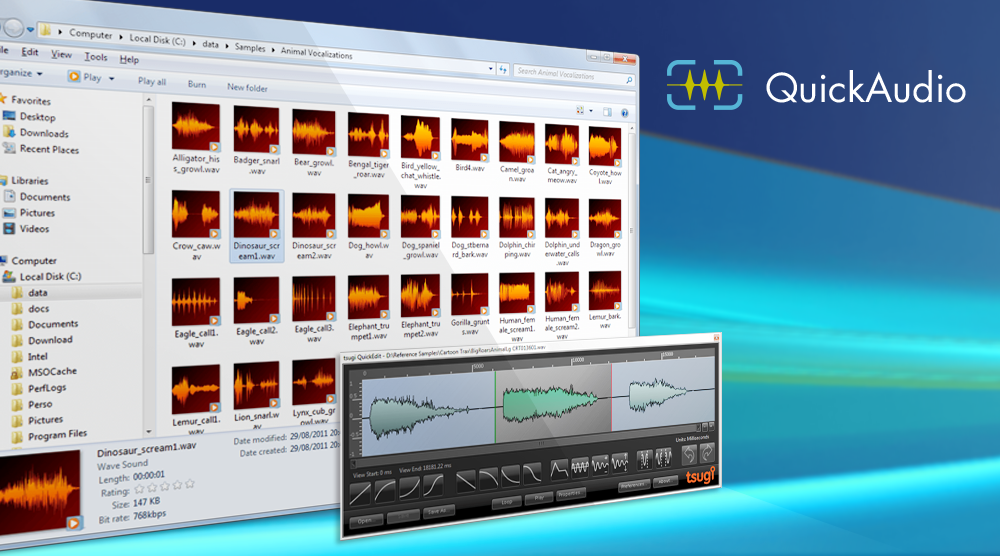
If you are not familiar with QuickAudio yet, check this video to learn how it can dramatically improve the productivity of anybody dealing with sound files.
You can download the QuickAudio 1.0 demo here and the 1.1 update here (valid for both the commercial and the demo versions).
Configuring the export parameters
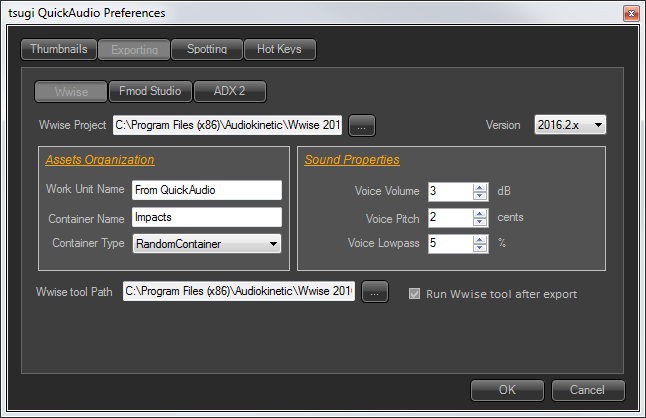
To configure the default parameters of the export feature, right-click on the QuickAudio button on the Windows taskbar and select “Preferences…” Click on the second tab (“Exporting”) and at the top choose the game audio middleware you want to use (“Wwise“, “FMOD Studio” or “ADX2“), then select the correct version number on the right.
Browse to your game audio project. Once it is selected, it will be analyzed and the other controls in the window will become available.
For Wwise, you will be able to choose the destination work unit, the container’s name and its type, as well as the default volume, pitch and lowpass cutoff for the assets. In the case of FMOD Studio, you can select the type of events (single, multiple or scatterer) to generate, in what folder to do it and their default parameters. You can also indicate in what bank the raw assets should be copied. Finally, for ADX2, the name of the cues to create and their type, as well as the parent cue sheet and the default cue parameters can all be specified.
In all cases, you can also enter the path to the authoring tool and instruct QuickAudio to launch it after export.
Adding assets to your game audio project
To add samples automatically to your game audio project, select the sound files in Windows Explorer. Right-click and select “tsugi QuickAudio” in the popup menu, then click on “Export…” Finally, choose the game audio middleware you want to export to. At this point a window will appear, allowing you to override the default export settings if needed. Click “OK” and the samples will be exported to the game audio project, the containers, events or cues of the right types will be automatically created and the chosen parameters will assigned.
Also, if you checked that option in the preferences, the authoring tool of your game audio middleware will be launched and your project loaded, so that you can easily check the result of your export.
Here we show the process with Wwise:
Please note that you can also assign a shortcut to the export command for an even faster workflow. To do that, go to “Preferences…”, select the “Hot Keys” tab and, in the “Exporting” section, select the hot key by using the combo box associated with your game audio middleware. Next time, you will just need to select the samples, press on that key and voilà; the samples will be in your project!