


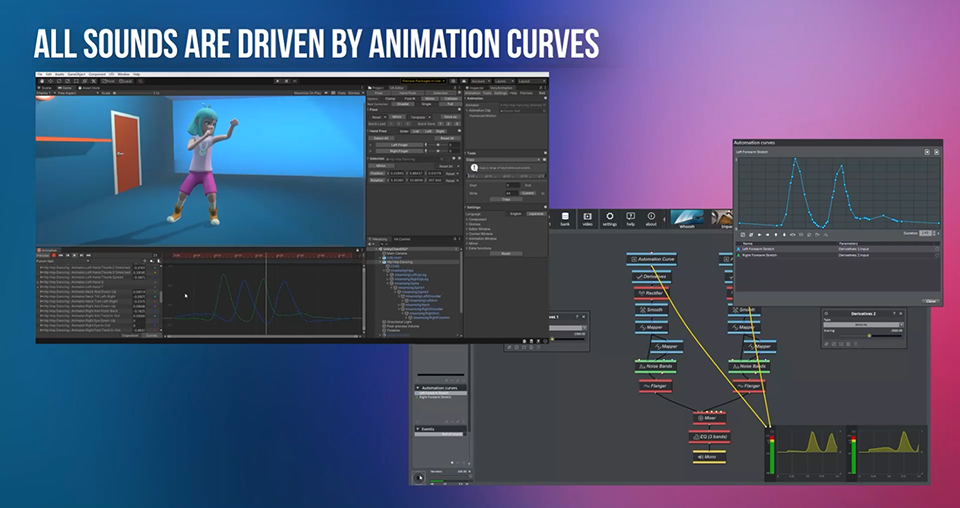
GameSynth was designed from the get-go to simplify the creation of sound effects for animations, be it in games or movies. It can import animation curves and motion capture data from major 2D/3D graphics packages, and integrates with popular game engines.
Thanks to GameSynth’s specialized synthesizers (Whoosh, Particles, Footsteps…) and its comprehensive patching environment, you will be able to generate a wide range of sounds whose parameters can be driven by animation curves.
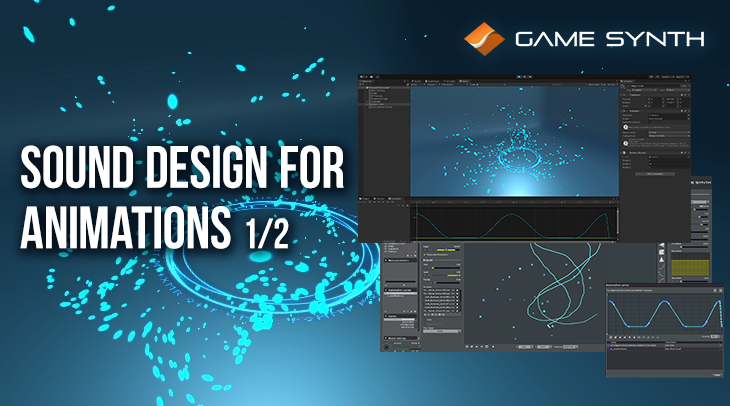
Furthermore, the GameSynth Tool API gives you access to all these features within your usual tools, streamlining your creative workflow. This 2-part series will show you how to easily create expressive sounds for your animations!
GameSynth and Animation tools
Using a procedural audio tool such as GameSynth to design sounds for animations offers many advantages. For instance, the sounds can be automatically re-generated to match an animation curve, either when it has been modified or when its duration has changed.
There is no need to record new sounds or to edit the previous ones. Since new content is generated when the duration of the animation changes, there is no need to loop the audio files, or to time-stretch them, resulting in a more natural and artifact-free audio track.
GameSynth will import curves from 2D animation tools such as Sprite Studio, Live 2D or Spine, from middleware such as Unity, Game Maker, or Houdini, or from any 3D graphics application with FBX support (Maya, 3ds Max, Motion Builder, etc.). BHV motion capture data can also be used.
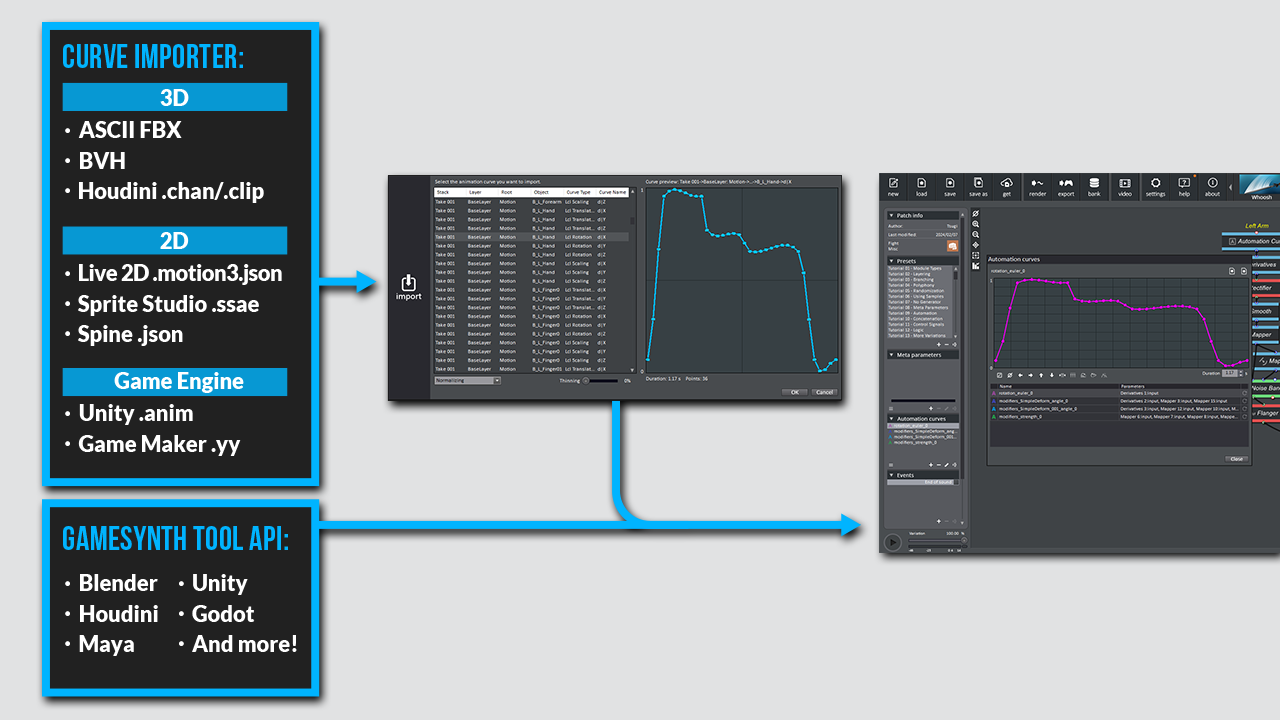
Alternatively, if your animation tool supports scripting, the GameSynth Tool API can be used to export animation curves and render sounds directly in your project, without even leaving your main tool. Many scripts and add-ons are already available for Blender, Unity, etc., and the list keeps growing! We will talk more about this in part 2 of this series.
Importing Curves
Importing animation curves is quick and easy. Once imported, they will be converted into automation curves that are used in GameSynth to control sound parameters over time.
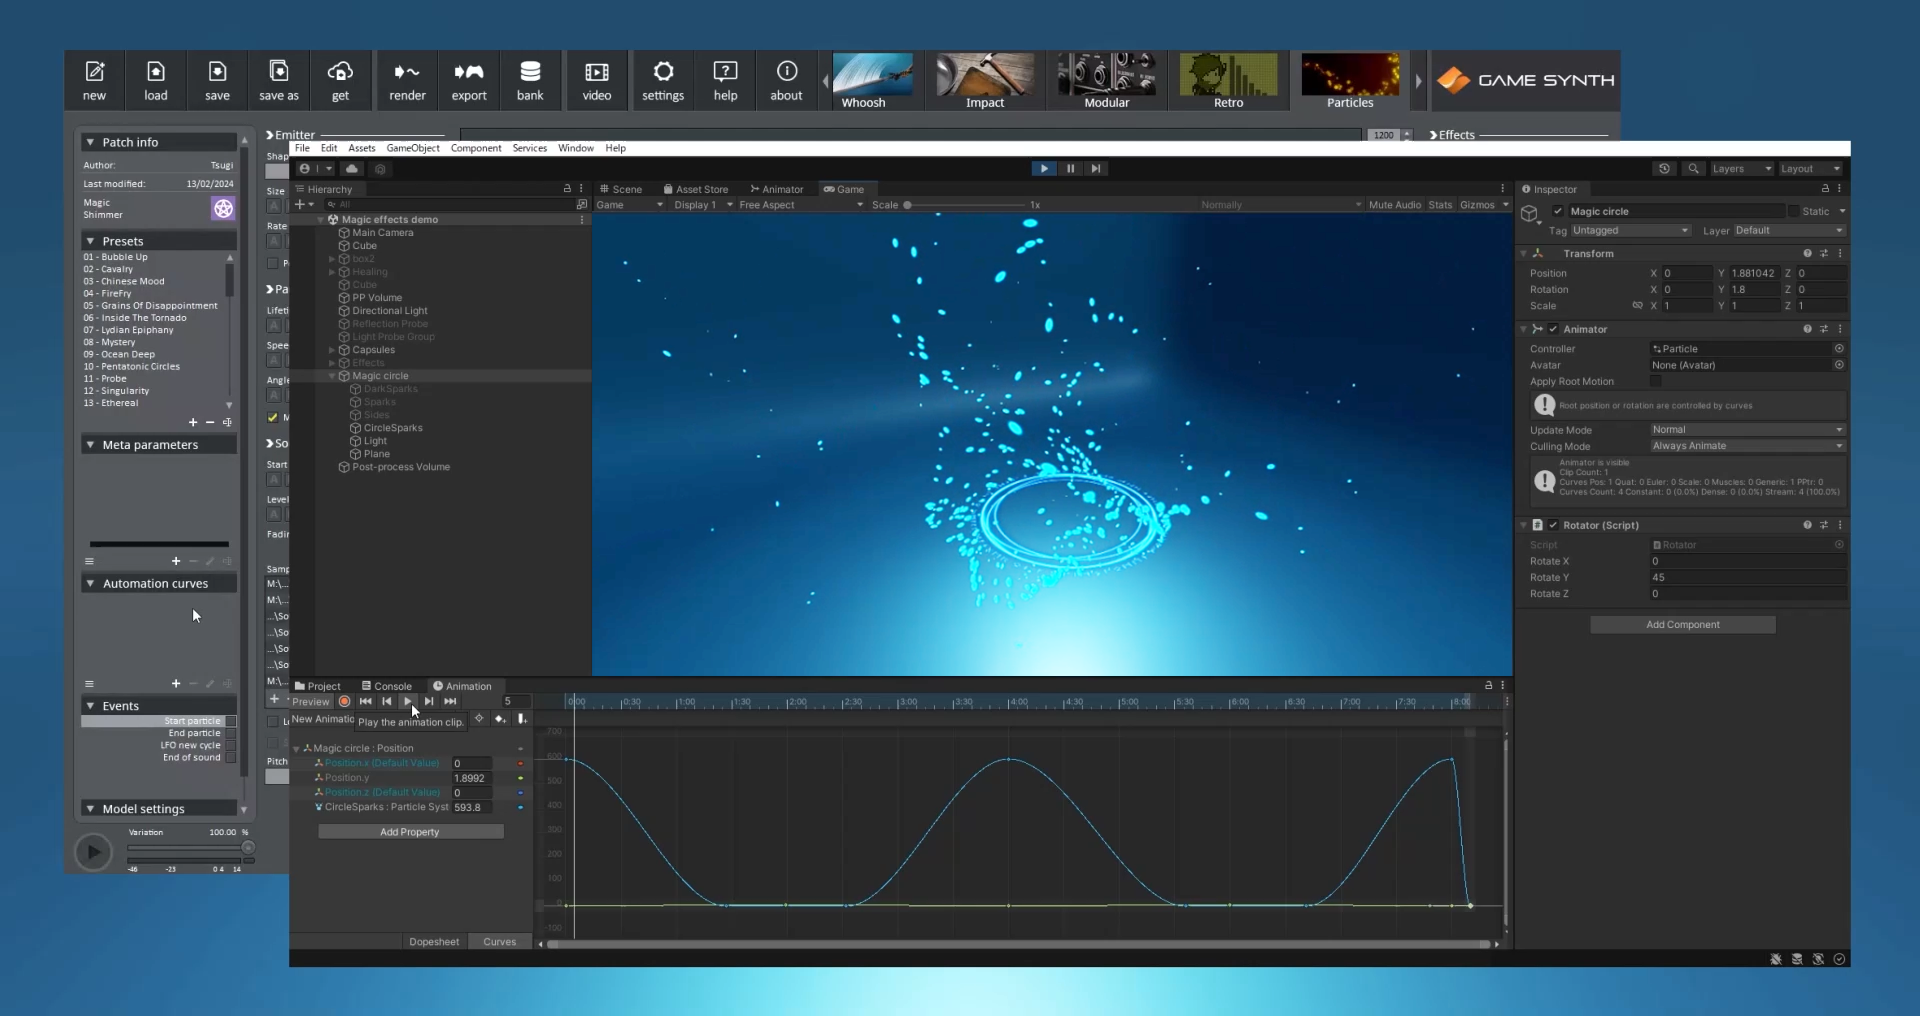
For our first example, let’s do it in GameSynth’s Particles model, which is especially well suited for adding sounds to animations with visual effects:
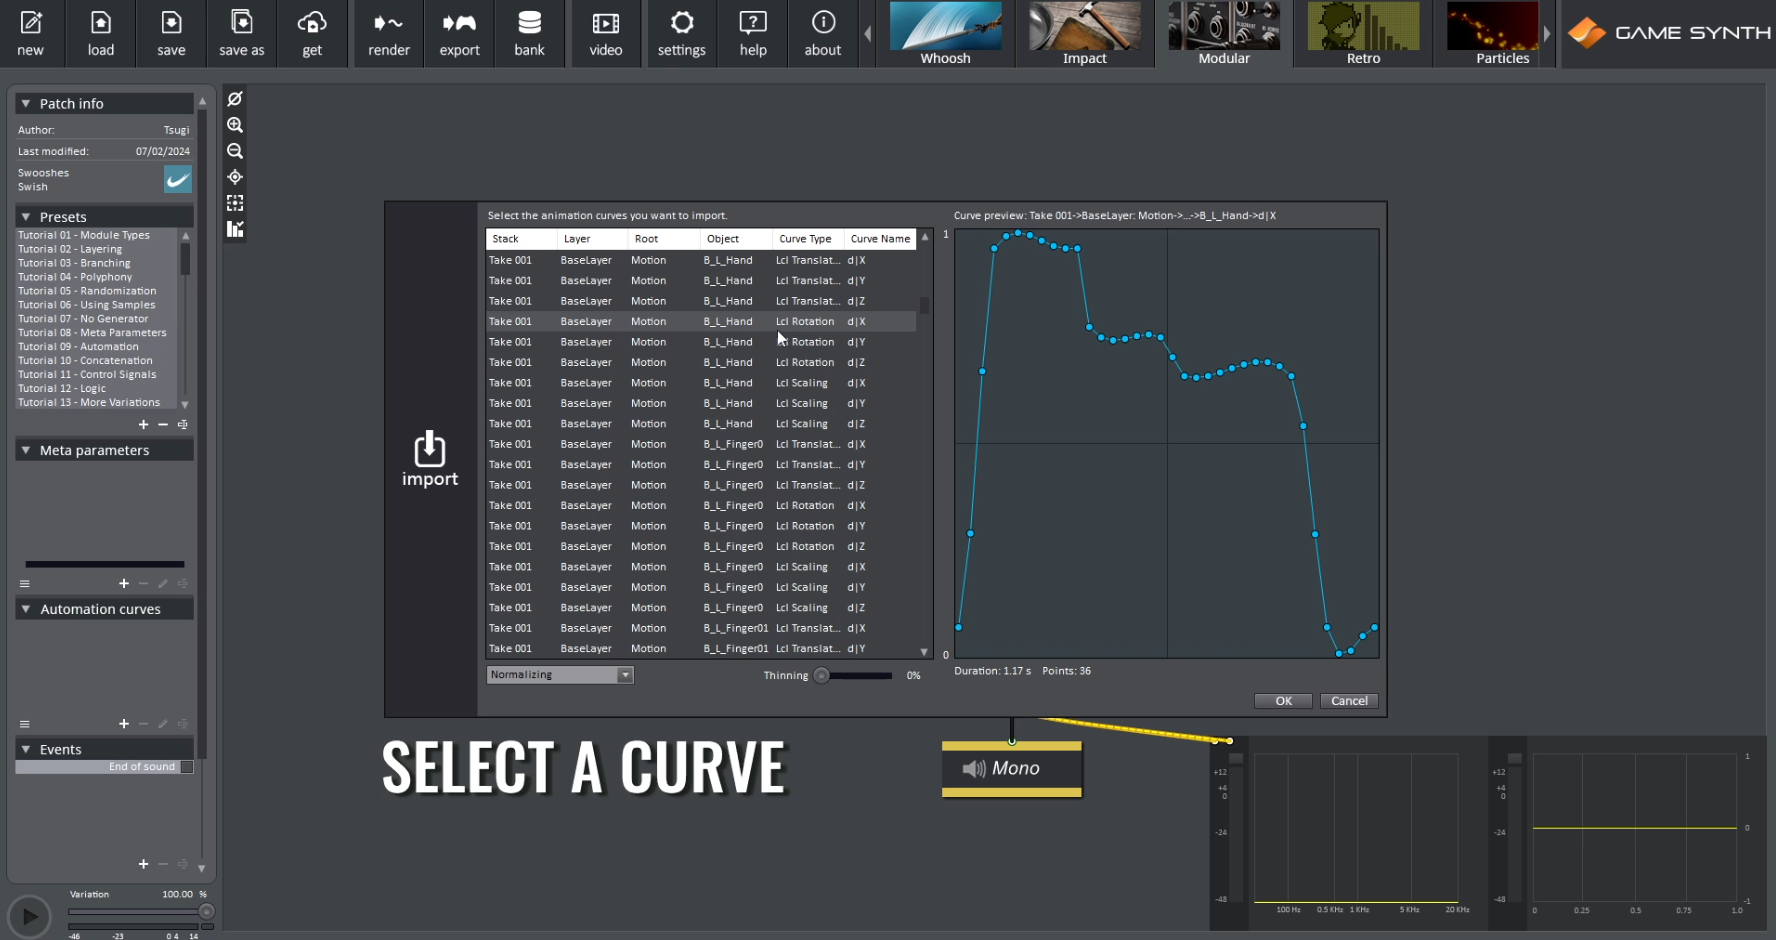
- Right-click in the Automation Curves panel and select Import curve.
- Select the animation file you want to load.
- In the curve window, select one or several curves you want to import from this animation (with Ctrl + Click).
- Choose how to process the curves (normalization or clipping) if needed.
- You can also thin out the curves. This is especially convenient for motion capture files – which can be quite large – or when a curve has many aligned points, making them irrelevant to audio generation.
Press OK and the new curves will appear in the Automation panel. They can be freely edited to get the exact effect wanted when driving sound parameters.
To assign an Automation Curve to a sound parameter:
- Drag and drop the curve from the automation panel onto the “A” button to the left of the target parameter.
- You can repeat this process to control several parameters with a single Automation Curve.
In our example, we use the Y position of the magic circle to control the filter Cutoff and the Start point of the sounds loaded in Particles, while the sparks’ rate curve controls both the Emitter’s Size and Rate.
In addition to importing animation curves, GameSynth features a video player that synchronizes with the drawing on the Sketch Pad. Here, it allows us to easily control the Pitch of the sound in sync with the motion. If we use a pen tablet, we can even use the pressure to change the amplitude of the sound.
By allowing you to control the sound parameters with the animation curves and to draw sounds in sync with a video, GameSynth provides the most intuitive workflow when creating sound to picture.
The animation import workflow will be similar for the other GameSynth synthesizers (Impacts, Footsteps, Weather, Engines, etc…). However, in the patching environment, the method used to assign curves to sound parameters is slightly different:
- Import an animation curve into the Automation panel as previously.
- Drag and drop the curve from the panel to the patching surface. This will automatically create an Automation module.
- Now you can pull a cable from the Automation module and connect it to the inputs of the other modules to control their parameters.
Importing animation curves in GameSynth is quite easy. Combined with the Sketch Pad, it allows you to literally draw sounds while perfectly matching an animation’s movement.
In the second part of this tutorial, we will focus on the patching environment of GameSynth. The Modular model indeed offers many possibilities for sound creation based on animations, thanks to its many synthesis, processing, control, and logic modules. We will also see how the GameSynth Tool API can make the process even smoother!

