

In this post, we will learn how to combine GameSynth and its Engines plug-in with FMOD Studio to easily implement interactive engine sounds.
In GameSynth
The Engines Plug-in is physically accurate, making it possible to create vehicle sounds with a precise RPM value:
- Select the type of vehicle.
- Create a Meta Parameter called RPM.
- Assign it to the RPM Meter (by dragging it and dropping it on the meter, it will control the RPMs).
- Tweak the Meta-Parameter’s curve so that so that the RPM starts between 1000 and 2000 RPM (depending of the vehicle model you selected).
At this point, if you change the Meta-Parameter value, you will see that the RPM Meter is matching it precisely.

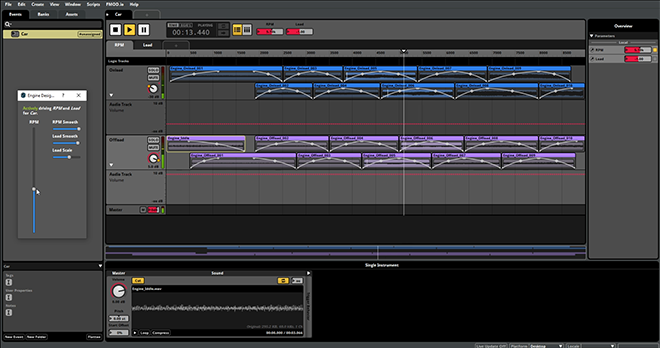
It is time to export two batches of samples, one with the Throttle at its maximum value, to simulate the engine running on-load, and the other with the Throttle at 0 for the engine running off-load. Note: before exporting, make sure that the Variation slider is set to 0%, to export samples that match acoustically.
- To export, click on Render.
- Choose a name, and let the Audio format in 16 bits, mono and WAVE.
- In the Variations section choose the number of files to render (between 5 and 10)
- Then, for the Method, opt for Meta-Parameter, selecting your RPM parameter. Also select Value as a suffix.
- Click Render and choose a Duration of 10 seconds.
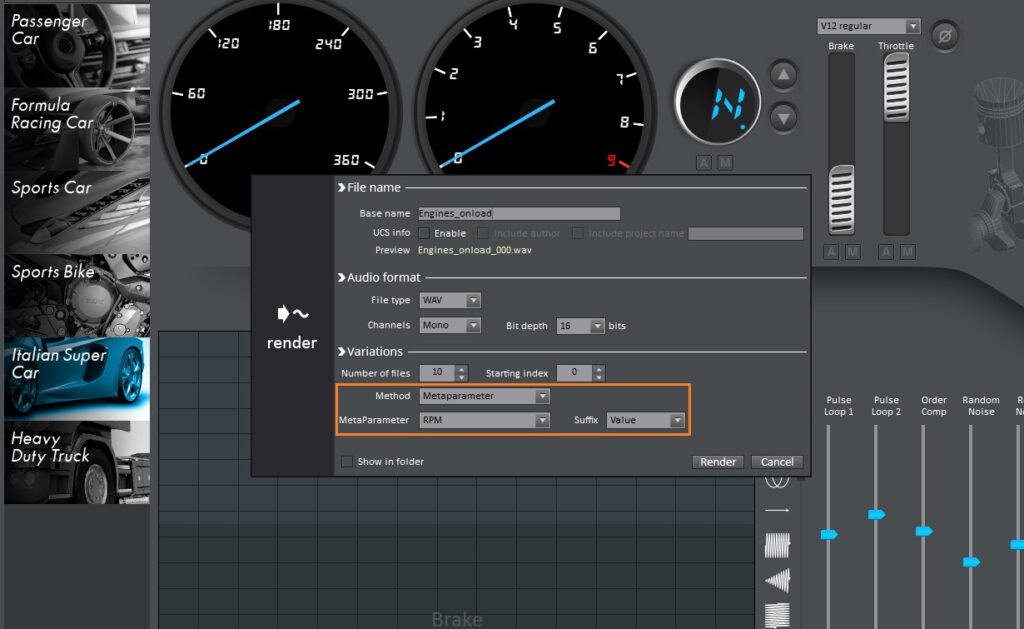
GameSynth will generate the variations by progressively increasing the value of the RPM parameter for each sound. Since we used the same model and Meta-Parameter, the on-load and off-load sounds will match perfectly.
In FMOD Studio
Before importing the samples in FMOD Studio, seamless loops must be prepared in your DAW. Since we rendered 10 seconds for each sound and the RPMs don’t fluctuate, the process should straightforward. Of course, you can also take this opportunity to further tweak the sound if you wish. Once the samples are ready, follow these steps:
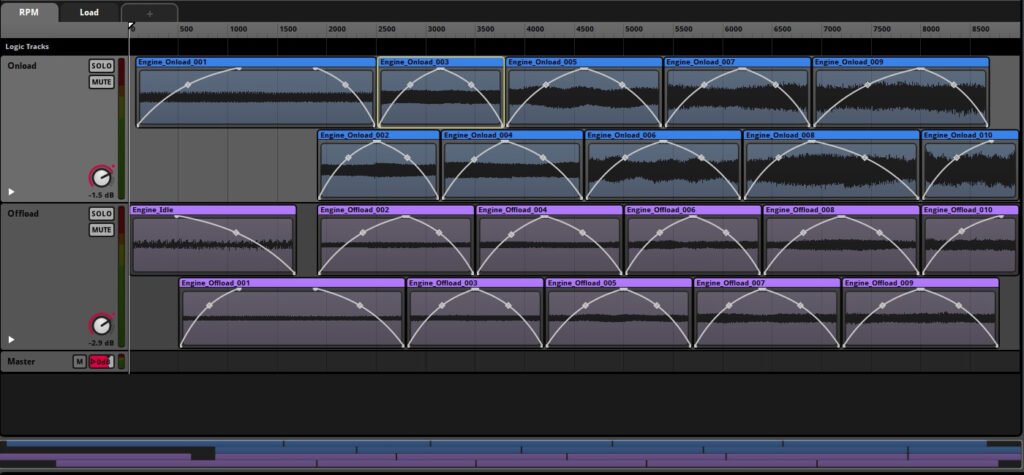
- Create a New Timeline Event
- In the Event, delete the Timeline sheet, and create two Parameter sheets, one called RPM and the other called Load. RPM range should match your RPM Meta Parameter in GameSynth, and Load should be between -1 and 1.
- Create two tracks one for on-load, the other for off-load.
- Then drag and drop the sounds as Single Instruments on their respective tracks, and place them on the timeline to match the RPM value.
- Scatter the sounds so they cross-fade.
- Finally, select all the sounds, and in the Instrument Panel, activate the Cut and Loop Instrument
For this implementation to work, the pitch needs to follow the RPM value:
- Select all the sounds on the timeline.
- In the Instrument panel, right-click on Pitch, Add Modulation and select Auto Pitch.
- For each sound, change the Root Pitch value of the Auto Pitch to its actual RPM value.
Now, if you play the sound and change the RPM parameter, the pitch should follow.

Finally, to switch between on-load and off-load sounds:
- Go to the Load parameter tab
- Right-click on the Volume knob and Add Automation for the two tracks
- On the on-load track, create a fade-in curve from -30 dB to 0 dB
- And on the off-load track, create a fade-out curve from 5 dB to -30 dB

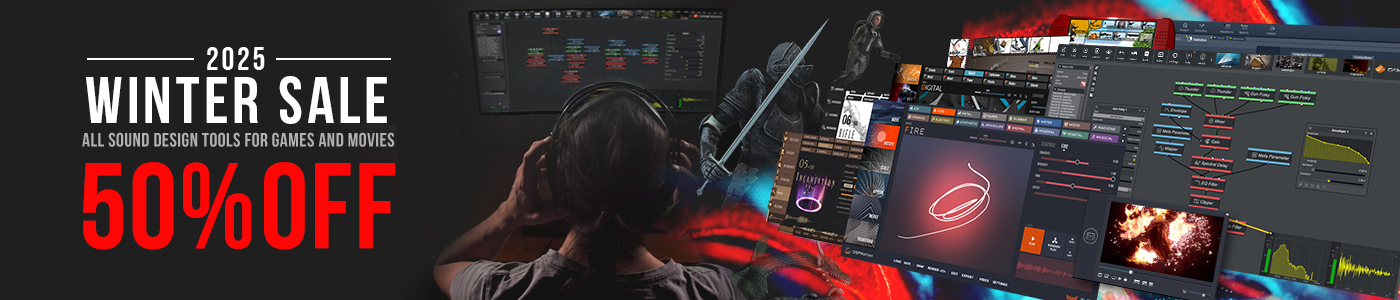
This will allow for the smooth transition between the on-load and off-load states as you accelerate or decelerate. You can test the whole system by using the Engine Designer (in the Scripts menu, FMOD Examples), which automatically uses the RPM and Load parameters together.
The resulting FMOD Studio project can be downloaded below. It was created with version 2.02.05.