Sound is a crucial component of any cinematic experience. It has the power to evoke emotions and add impact to the story. In this post, we explore some of the key elements involved in crafting cinematic sounds in GameSynth.
Whoosh
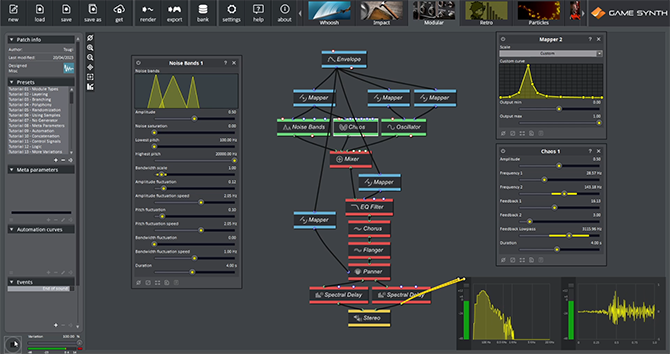
Although there are many ways to create whooshes in GameSynth, using the Modular model allows us to design our own whoosh generator by combining different modules. A good starting point is to use a module that produces noise, and then build the patch from there.
- In our case, the first layer is a Noise Bands module, with three wide bands in the low and mid frequencies.
- Some additional harshness is then added by a Chaos module.
- The last layer is a simple Sine Oscillator at low-frequency to boost the bass.
Once the generators are set, controls can be added to shape the sound.
- As whooshes usually follow an attack-release shape, this type of curve is used in the Mappers connected to the generators’ amplitude inputs.
- All the Mappers are controlled by a unique, ascending, linear Envelope. Using only one module makes it easier to apply variations on the duration, and to control the shape of the whole patch.
Finally, some effects are added:
- The EQ Filter will help enhance the overall movement, its frequency being controlled by the aforementioned Envelope and a dedicated Mapper.
- Both Chorus and Flanger modules add some modulation. Depending on the type of whoosh, a LFO could also be used.
- Finally, a Panner followed by two Spectral Delays will produce a dense stereo effect.
By assigning random ranges to some of the parameters, a large range of whooshes can be generated.
After some simple modifications, and the addition of a MetaParameter controlling both the pitch and the filter’s cutoff, it is possible to import the patch in the Whoosh model and control its sound by drawing on the Sketch Pad in real-time.
Riser
Risers are used to bring tension to a scene. They build up progressively until reaching a climax.
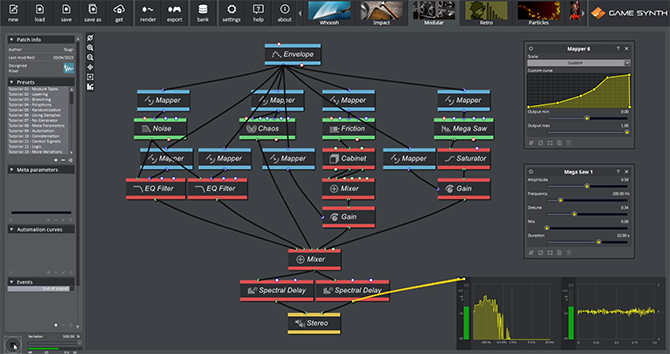
- Like for the whoosh, a single Envelope connected to several Mappers controls the overall shape of the riser. In this case, the Mappers use various ascending curves that abruptly drop at the very end.
- A Pink Noise serves as the base sound for the movement. It feeds two EQ Filters, one of them having a higher resonance in order to generates a more tonal sound.
- A Chaos module progressively introduces some harshness, its feedback value constantly increasing until the end of the sound.
- The Friction module brings some resonances to the sound, especially at the beginning as it will then be progressively masked by the noisier layers.
- At the end of the riser, a strident sound gradually appears, generated by a Mega Saw fed to a Saturator.
- Finally, two Spectral Delays widen the sound.
Impact
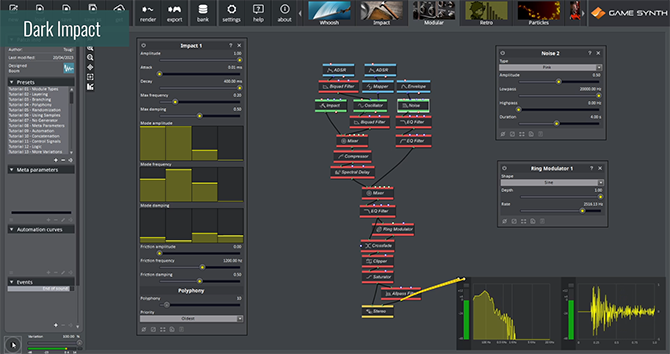
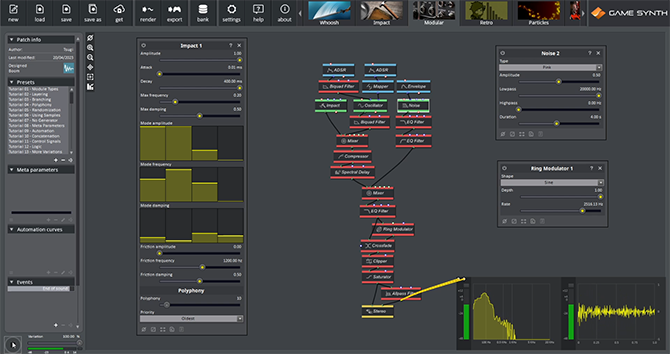
Impacts too can be generated in many ways in GameSynth. The Modular model itself offers several modules useful for cinematic sound design: Modes, Impact, Clang, or even Thunder and Gunshot if you need more powerful options. For example, here is how to create a simple, dark impact:
- Impact and Oscillator modules at low frequencies are combined to create the initial strike.
- Their output is sent through a Compressor and a Spectral Delay to give more substance to the sound.
- On a separate branch, a Pink Noise is fed to an EQ Filter configured in lowpass. Its long release creates a noisy tail – like a fake reverb – which makes the sound even bigger.
- Everything is glued by another lowpass, a Clipper and a Saturator.
- A Ring Modulator adds a gritty tone, resulting in an eerier sound.
- Finally, a stereo effect is created by using an Allpass Filter on one of two identical outputs.
Stinger
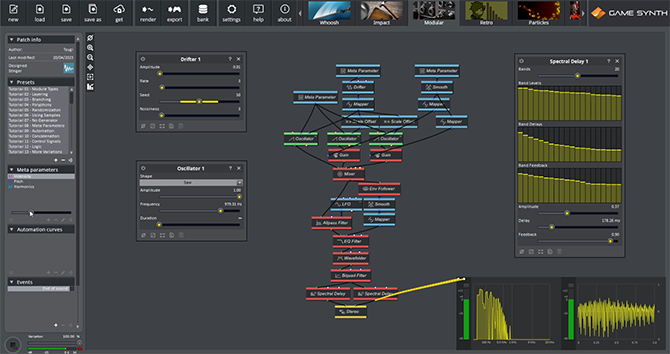
Stingers are also used to mark moments of tension, but are subtler than a riser. Here is a way to make some synthetic, Blade Runner-esque sound:
- To start with a harsher sound, three slightly detuned Saw Oscillators are used.
- An Allpass Filter controlled by a LFO smooth the sound while adding some modulations.
- An EQ Filter, controlled by an Env Follower then progressively opens as the amplitude of the generators raise, adding emphasis to the movement.
- A Wavefolder adds harmonics when the amplitude reaches its maximum.
- Meta Parameters on the amplitude and pitch of the Oscillators allow for a precise control of the sound of the patch.
- An additional Drifter slowly changes the pitch over time creating more tension.
- Once again, a couple of Spectral Delays are used to create a stereo space.
The Spectral Delay module can be used in many ways. By randomizing the bands, it can transform any sound into a granular texture. It can also be used as a resonator to create huge metallic sounds. Here, we used a pair of modules with different settings to produce interesting stereo effects (this is so useful that we created a dedicated template for this, accessible via the Import modules command of the context menu).
Cinematic sounds are often more abstract, leaving a lot of room for experimentations. With its unique generators and advanced modulation capabilities, GameSynth is the ideal tool to design such sounds. In addition to the four examples described in this post, we encourage you to browse the Repository and search for the “Cinematic” tag for even more epic sound design!


